INTRODUCTION :
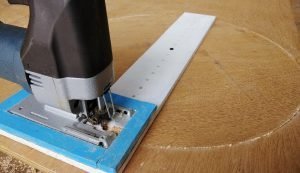
Beam compass is a compass with a beam and sliding sockets for drawing or dividing of circles larger than those made by a regular pair of compasses. A beam compass is used to scribe a circle of large size, either by drawing with lead or scratching with a sharpened point of compass. This instrument can be as a whole, or made on the spot with individual sockets and any suitable type of beam.
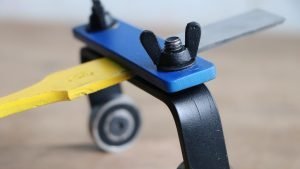
The radius of circle can be adjusted by sliding the metal point holder across a wood beam, and locking it by turning a knob or fly nut at the desired position. Some of the beam compass has a fine radius adjustment. The only limitation is the rigidity of the wood beam of the compass. Long size wooden beams tend to sag depending on the species of wood used. Beam compass score a precise line by using a sharpened point, and also draw a line using a lead clutch, or pencil. When the circular knob or fly nut is tighten than the position of the sliding block is fixed at desired location.
Material used :
- Wooden strips
- Two bolts and fly nuts
- A nail
How to make :
Step 1 :- Cut the wooden strip and block

First step is cut the wooden strip of 10” long to make the strip of beam compass, and also cut the little block to make the sliding part of the beam. Cut the wooden strip at both side of strip and make it square shaped as shown in the image. By using of sander file, grinding the corner of the strip and make round shape of it.
Step 2 :- Drilling holes

After cutting of the wooden strips and sliding block, next step is drilling holes. Drilling a hole on the wooden strip for pencil and also drilling other hole for bolt, to fix the pencil using this bolt. The sliding blocks gets a square hole for wooden strip and second one is for bolt.

Step 3 :- Make a slot

Make a slot in the middle of sliding block to fix the position of it at desired position by using of bolt and fly nut. Also make a slot in the wooden strip to fix the pencil or lead clutch by using of bolt and fly nut.

Step 4 :- Add a nail

First of all cut the head of the nail with pliers and after that, I pushed a nail by hand in the pilot hole of sliding block, and fix the nail in the pilot hole by using of glue.
Step 5 :- Assembly of parts

Put the sliding block with nail on the wooden strip, and pass the bolt through the hole of sliding block and tighten the fly nut on it. Add the pencil in the hole of wooden strip, and tighten the bolt and fly nut.
Step 6 :- Finishing and polishing

This is the last step, I have used sander machine to grinding and finishing of the corner of the beam compass. After finishing of all parts the next step is polishing, using of wudfin wood polish (yellow). Now the beam compass is ready to use.
For more information, watch the video given below.


