

INTRODUCTION :
A toolbox is a box to organize, carry, and protect the owner’s tools.They could be used for trade, a hobby or DIY, and their contents vary with the craft of the owner. A toolbox could refer to several types of storage to hold different types of tools. It could mean a small portable box that can carry a few tools to a project location or a large storage system set on casters. Modern toolboxes are predominantly metal or plastic.
Small portable toolboxes are sometimes called hand boxes or portable tool storage. Most portable toolboxes have one handle on top and a lid that opens on a hinge. Many have a removable tote tray that sits on a flange inside the lip of the toolbox, with a single larger compartment below. The tote tray helps organize smaller parts, hand tools and accessories. Portable toolboxes sometimes use slide-out trays or cantilever trayes in lieu of the removable tote tray. Metal toolboxes weigh more than plastic ones. A plastic toolbox laden with tools can weigh the same as a comparable steel toolbox does when empty. Metal toolboxes are also subject to rusting and their sharp edges can mark the surfaces of things they are banged against. Metal is, however, known for being stronger than plastic, so one should balance its disadvantages against the need to withstand abuse and support the weight of many hand tools.
Portable chests are a type of tool storage that is small enough to carry, but has drawers to organize contents. Portable chests have a handle on top for portability and a top lid that opens on hinges. Portable chests typically have 3-4 drawers. Most are made from metal, but some have a plastic shell with metal drawers in order to help lighten the piece. Here I make a wooden toolbox and for better strength I also used metal sheet. I have used plywood and sheet metal to make this toolbox. It has high strength.
Parts Used :
- Plywood (10mm thickness)
- Metal sheet
- (14mm*14mm) Metal square pipe (27” length) for handle
- 2 nos. metal pieces (20mm width, 5mm thickness and 7” length) for handle support
- 8 nos. metal pieces (20mm width, 5mm thickness and 3.5” length each)
- 2 nos. L- Section channel pieces (25mm width and 40mm length each)
- 16 nos. 6mm countersunk allenky bolts (20mm length)
- ¼ allenky bolt (12mm length)
- Screws
How to make :

First step is cutting all plywood pieces of its desired dimensions.
Attach all this plywood pieces by using of nails and glue and make 3 compartments (one lower compartment and two upper compartments) as shown in the image. Dimensions are shown in the image.

Cutting 6 pieces of metal sheet of 1.5”*5.5” and bend it, as shown in the image.
Attach all this metal sheet pieces with lower compartment by using of screws, as shown in the image.

Attach 8 nos. metal pieces of (20mm width, 5mm thickness and 3.5” length each) with one lower compartment and two upper compartments using of 16 nos. 6mm countersunk allenky bolts (20mm length) on both side of the toolbox, as shown in the image.

Now the next step is to cut a strip of sandpaper wide enough to cover your drum, and long enough to wrap it completely and overlap a few millimetres.

Next step is to attach plywood pieces on two upper compartments as a cover for it. To attach this cover plywood pieces I have used bend metal sheet pieces attached with four corner of the two upper compartments and two cover plywood pieces, as shown in the image.

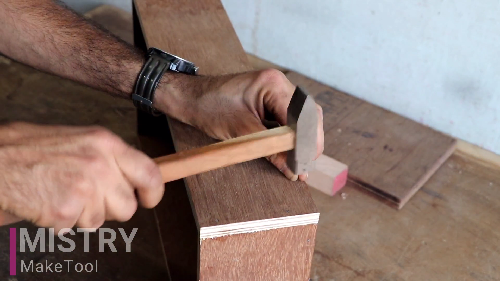
Attach (20mm width, 5mm thickness and 7” length) metal pieces for handle support on both side of lower compartments using of screws. It is slightly bend at the middle, so it can provide some space for the handle movement.

I have used metal square pipe to make a handle of the toolbox. Dimension of the square pipe is (14mm*14mm) and 27” length total.


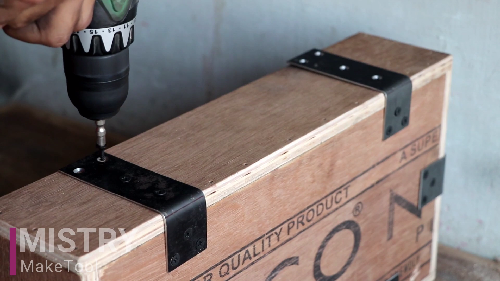
And at the last attach 2 nos. L- Section channel pieces (25mm width and 40mm length each) on upper compartments cover by using of screws, as shown in the image. I have used ¼ allenky bolt to lock-unlock the toolbox. Now the toolbox is ready to use.


Brother plz this tool box send me