INTRODUCTION :
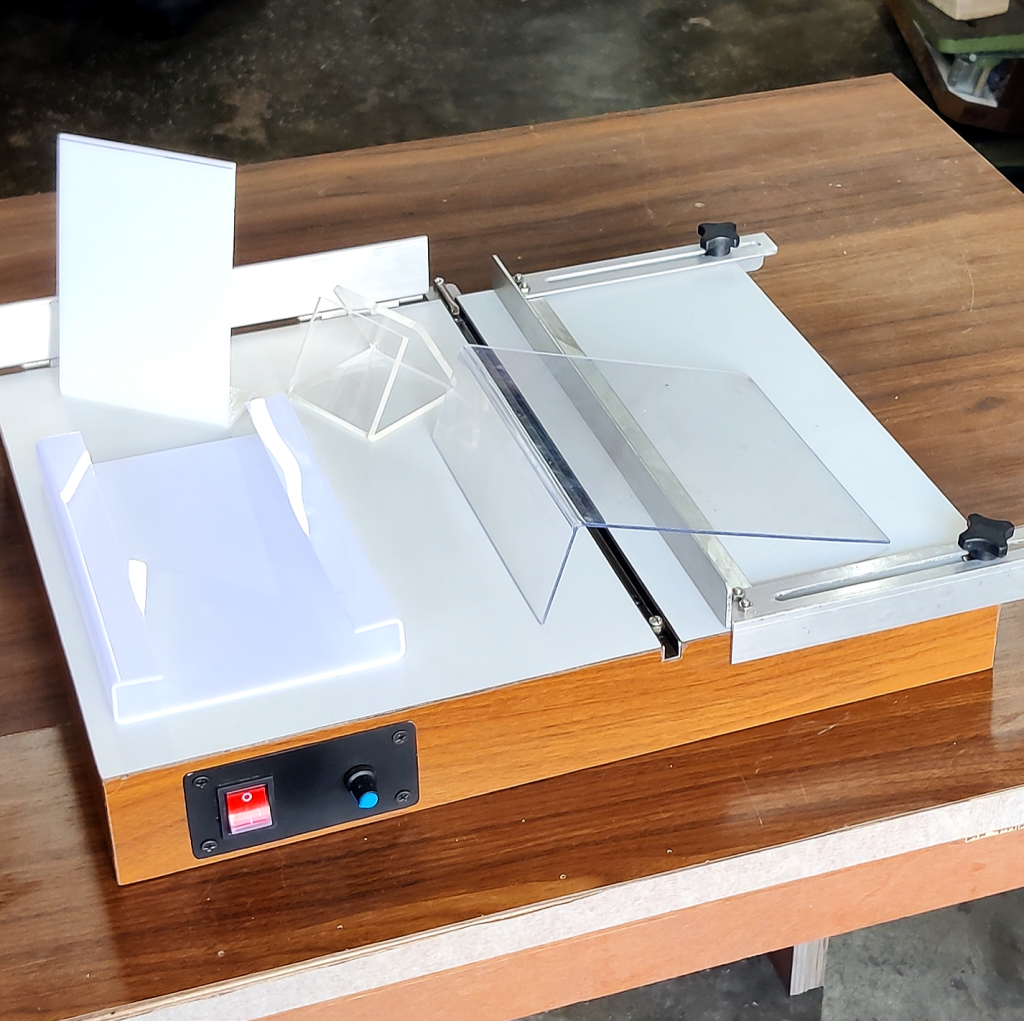
Acrylic bending machines use heat to soften acrylic and plastic sheets so they can easily form into any desired shape or angle. When the material is allowed to cool down, it becomes rigid again.
Acrylic bending machines are available in a variety of models and each of them is unique in its design and purpose. In my case, I have made my own design to fulfill my purpose.
It is used to bend plastic to make simple laboratory equipment. It is used to bend acrylic for billboards in front of hotels, malls, shops, display products, etc. It is used to bend acrylic for displaying products such as appliances, mobile phones, cosmetics, magazines, shoes, etc.
With this acrylic bending tool, you can easily make accurate 45, 90, and 135-degree bends. It has an integrated 24v and 2.5-ampere dc power supply adapter. This plastic bending machine can bend plastic sheets that are up to 6mm in width.
What Are Some Common Uses of Acrylic Bending Machines?
Acrylic bending machines are most commonly used to bend materials like Foam PVC, Plexiglass, Polypropylene, ABS, Perspex, and Polycarbonate. They use a heating element to soften them before they can be formed into the required shape.
Parts Used :
Plywood Piece of 18-inch * 14-inch dimension (19mm thickness)
2 Nos. plywood pieces of 18-inch * 2-inch (12mm thickness)
2 Nos. plywood pieces of 14-inch * 2-inch (12mm thickness)
Laminate sheet pieces
Aluminum C-Section channel (14-inch length)
2 Nos. Aluminum L-Section channel ¾ inch* ¾ inch (7-inch length) movable guide
Aluminum L-Section channel ¾ inch * ¾ inch (14-inch length) movable guide
Aluminum L-Section channel 1 ½ inch * ¾ inch (10-inch length)
32 gauge nichrome wire (15-inch length)
On-Off switch
24v – 2.5-ampere power supply adapter
Power connector
PWM dc controller
2 Nos. ¾ inch hinges
1 square mm electric wire
Wire holder
Nails and screws
2 Nos. Pvc knob 6mm bolts
2 Nos. 6mm D- nuts
How to make :
The first step is to cut the all plywood pieces as per the dimensions. I have used a Plywood Piece of 18-inch * 14-inch dimension (19mm thickness), 2 Nos. plywood pieces of 18-inch * 2-inch (12mm thickness), and 2 Nos. plywood pieces of 14-inch * 2-inch (12mm thickness) to make the main table structure.
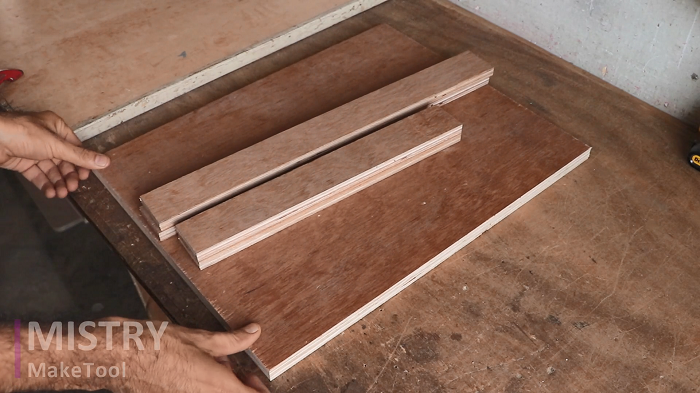
I attached all the plywood pieces using glue and nails.

Also, attach the laminate sheet to the table structure.
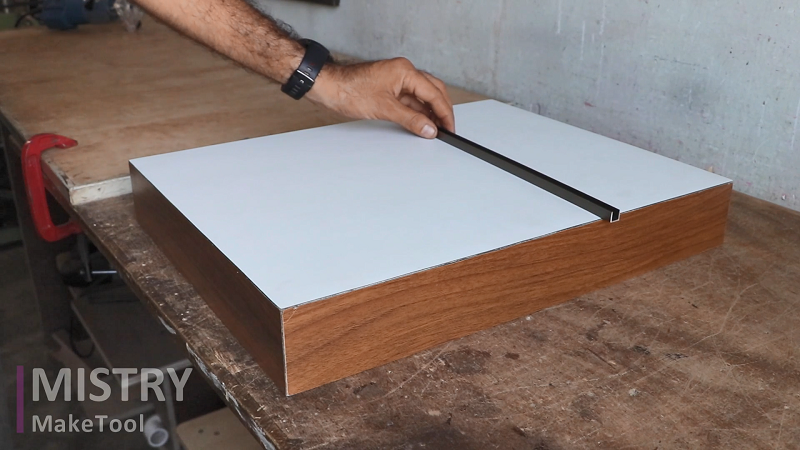
The next step is to make a straight cut on the base. This straight cut is used to fit the Aluminum C-Section channel (14 -inch length) in it. Next with a few drilled holes in the aluminum profile, I secured it on the base. Now, this C-Section channel is screwed in this straight cut of the base part.

Attach the ¾-inch aluminum L-Section channel piece at the end side of the C-Section channel by using screws.
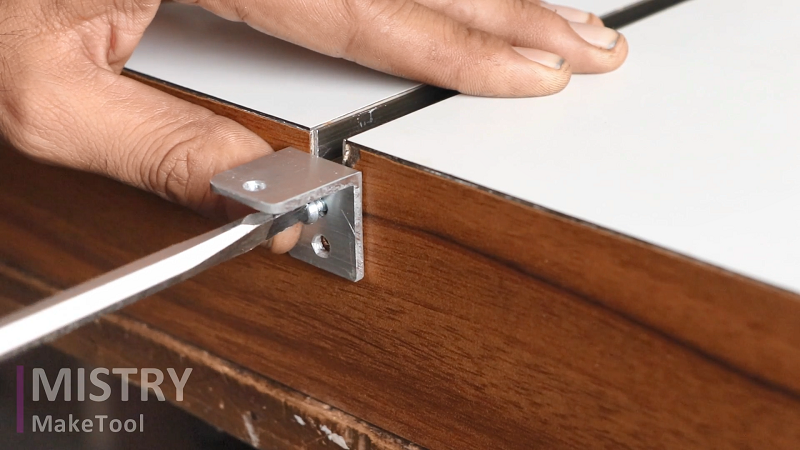
On this L-Section channel attach the nichrome wire with the small, as shown in the image.

Also attach nichrome wires to another end, on the other side of the C-Section channel with the screw and nut.
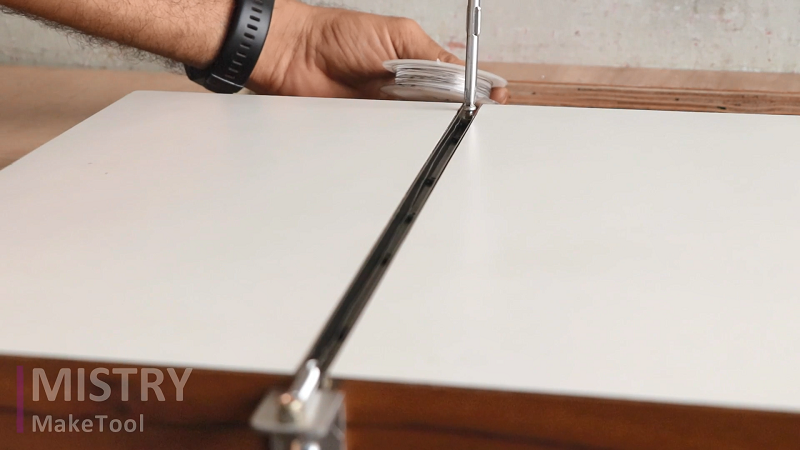
Make sure:
- That spring has enough tension
- The heating wire is tight between two bolts
- The heating wire is in the center of the aluminum profile.
- The heating wire MUST NOT touch the aluminum profile or it could cause a short circuit.
The next step is to attach the on-off switch and PWM controller. To attach both parts I have made a slot on one side of the table. To make this slot I have used a 35mm TCT hole saw.
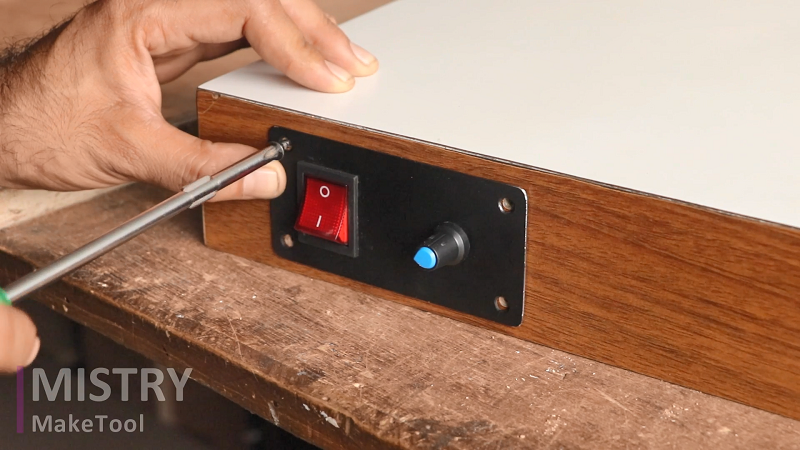
Attach the power supply connector.
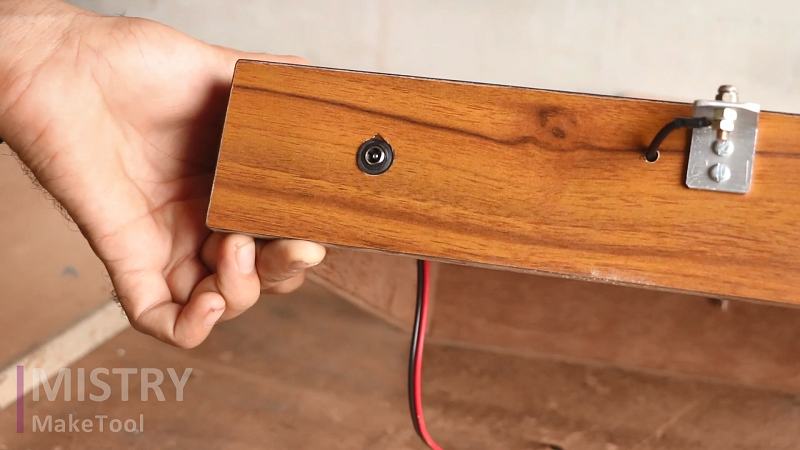
Connect electrical wires with on-off switch, pwm controller and nichrome wire. Make sure that the connections of electrical wires are correct as per the diagram.
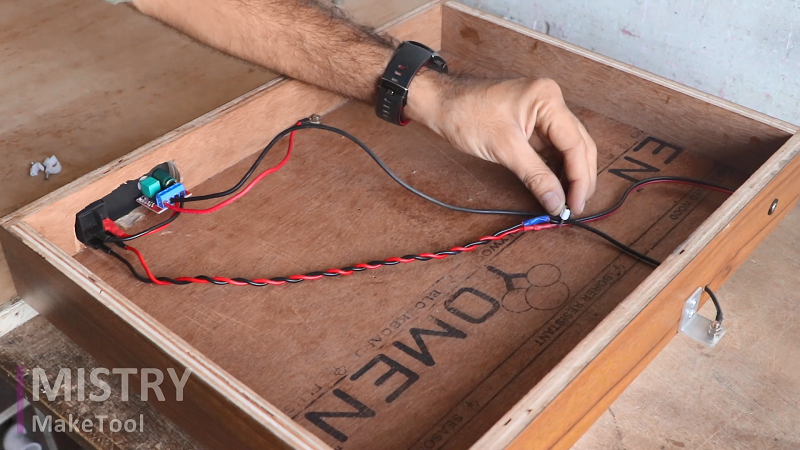
To power this tool I have used a 24V and 2.5A DC power supply adapter.
To make the sliding guide I have used a 2 Nos. Aluminum L-Section channel ¾ inch* ¾ inch (7-inch length), aluminum L-Section channel ¾ inch * ¾ inch (14-inch length), 2 Nos. Pvc knob 6mm bolts, 2 Nos. 6mm D- nuts, and screws.
The image shows the mechanism of sliding guide. It is works great.

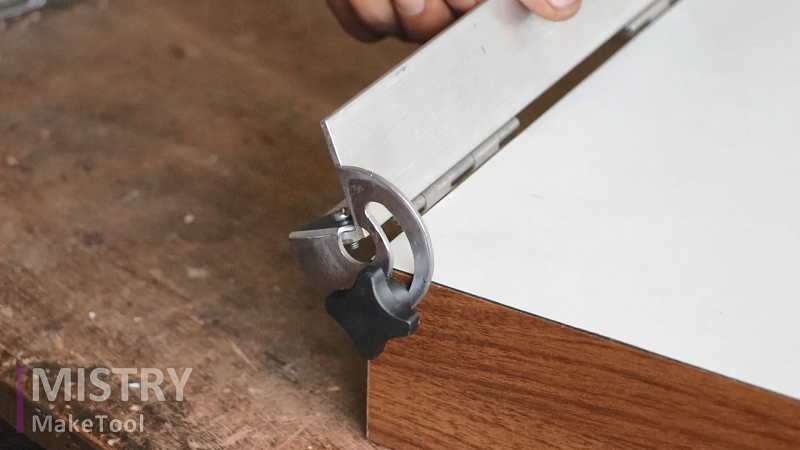
Next step is to make the tilting guide mechanism for this acrylic bender machine. To make this tilting guide I have used aluminum L-Section channel 1 ½ inch * ¾ inch (10-inch length), 2 Nos. ¾ inch hinges, washer, and screws.


Attach the aluminum L-Section channel 1 ½ inch * ¾ inch (10 inch length) with base structure using 2 nos. hinges.
To make tilting mechanism I have used a washer. Refer the image of tilting mechanism of the guide for better understanding.
Now the machine is ready for use. I have tested it and it works great.
I hope this Misty MakeTool post/video was useful and informative.


If you liked it, you can support me by liking this Mistry MakeTool / YouTube video and subscribing for more future content. Feel free to leave any questions about this build. Thank you, for reading/watching.
