INTRODUCTION :
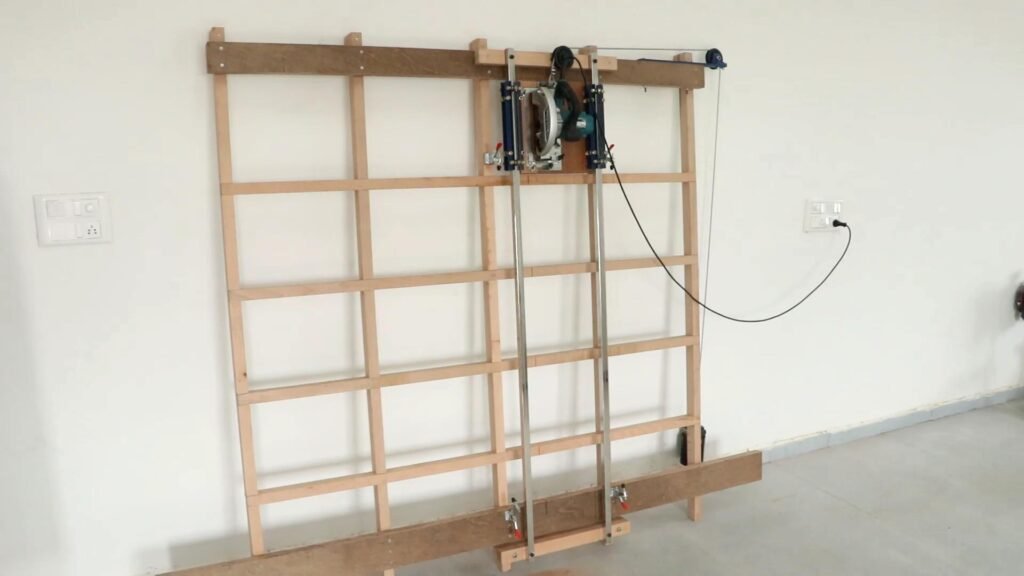
DIY Panel Saw with Circular Saw: A Step-by-Step Guide
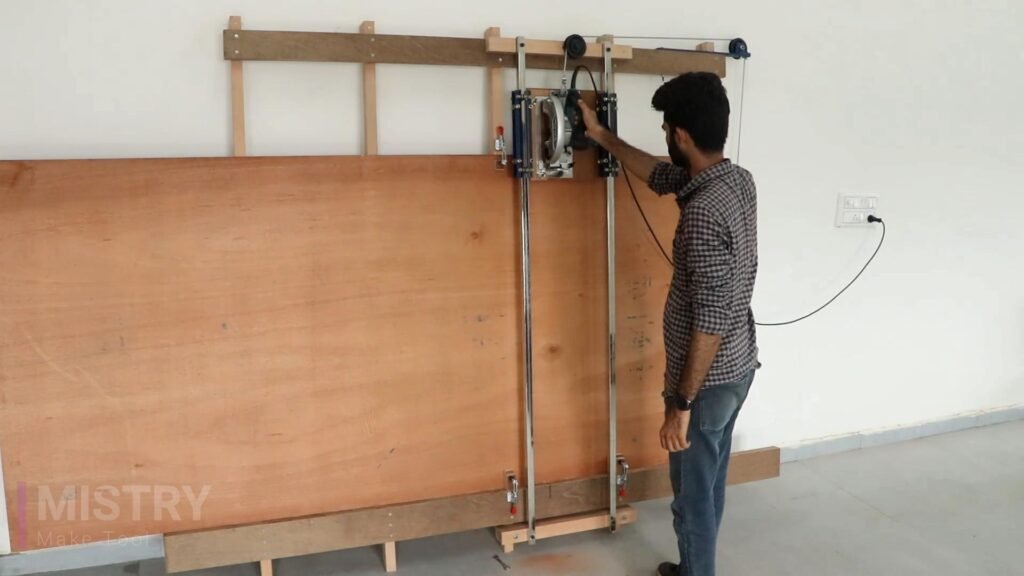
A panel saw is a stationary saw specifically designed for precise cuts on large sheet materials like plywood, MDF sheets, or drywall.
It utilizes a circular saw blade mounted on a sliding carriage that moves along a track.
The sheet material remains stationary while the saw carriage glides across it, creating clean, controlled cuts in plywood.
Often comes in vertical or horizontal configurations, with vertical saws taking up less floor space.
Some panel saws have scoring blades in addition to the main blade to minimize chipping on laminated materials.
Building your own panel saw from a circular saw is a great way to get precise cuts on sheet materials like plywood, MDF, or drywall.
Parts Used :
- Wooden boards rectangle 5cm*3.5cm (enough for a sturdy frame)
4 Nos. 72 Inch length
5 Nos. 76 Inch length
3 Nos. 22 Inch length (for steel pipe support)
- 2 Nos. 1 Inch Steel pipes (72 Inch length)
- 12mm Plywood 12 inch *12 inch with laminate (for circular saw base)
- 20mm Plywood 74 Inch*3.5 Inch (2 Nos.) frame support upper side
- 20mm Plywood 96 Inch *5 Inch (2 Nos.) frame support lower side
- 8 Nos. Iron ¾” L-angles 12 Inch length
- 16 Nos. Bearings 608 (to allow smooth sliding motion)
- 8mm Studs, nuts, and bolts (for assembly)
- 2 Nos. 3 Inch Pulleys and rope/wire (for height adjustment)
- 4 Nos. Toggle clamp
- Circular Saw
- Screws
- Safety gear (goggles, dust mask, gloves)
Tools:
- Saw (for cutting wood)
- Drill and drill bits (various sizes)
- Wrenches
- Clamps
- Measuring tape
- Square
How to make :
- Design and Planning:
- Sketch the layout of your panel saw. Consider the height of your work surface and the desired cutting depth of your circular saw.
- Decide on the dimensions of the wooden base and frame. Ensure its strong enough to support the weight of the sheet material and circular saw.
2. Frame Construction:
- Cut the wooden boards according to your design.
- I have used Wooden boards rectangle 5cm*3.5cm (enough for a sturdy frame) 4 Nos. 72 Inch length and 5 Nos. 76 Inch length, 20mm Plywood 74 Inch*3.5 Inch (2 Nos.) and 96 Inch *5 Inch (2 Nos.).
- Assemble the frame using the screws and glue. Ensure everything is square and secure.
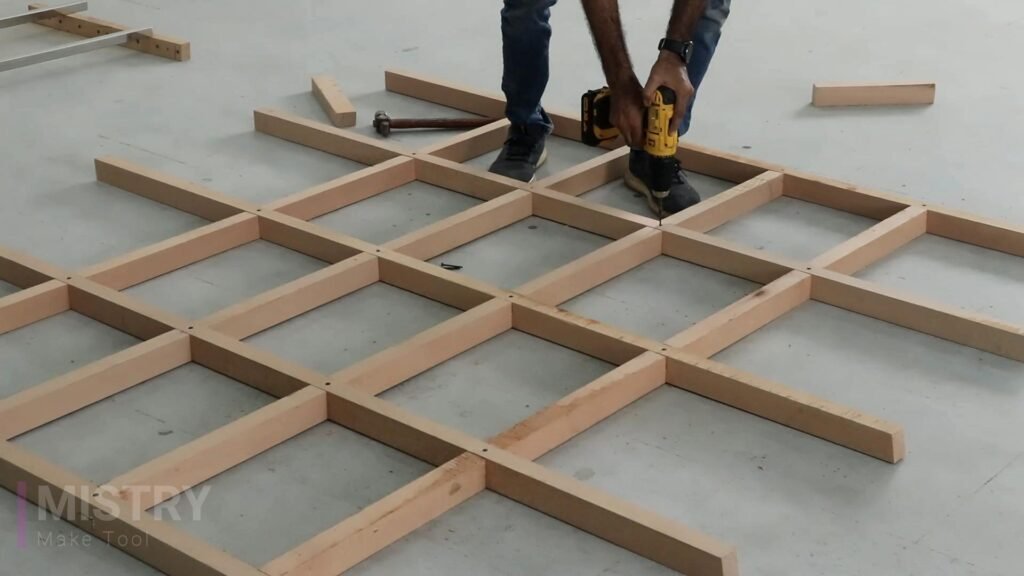
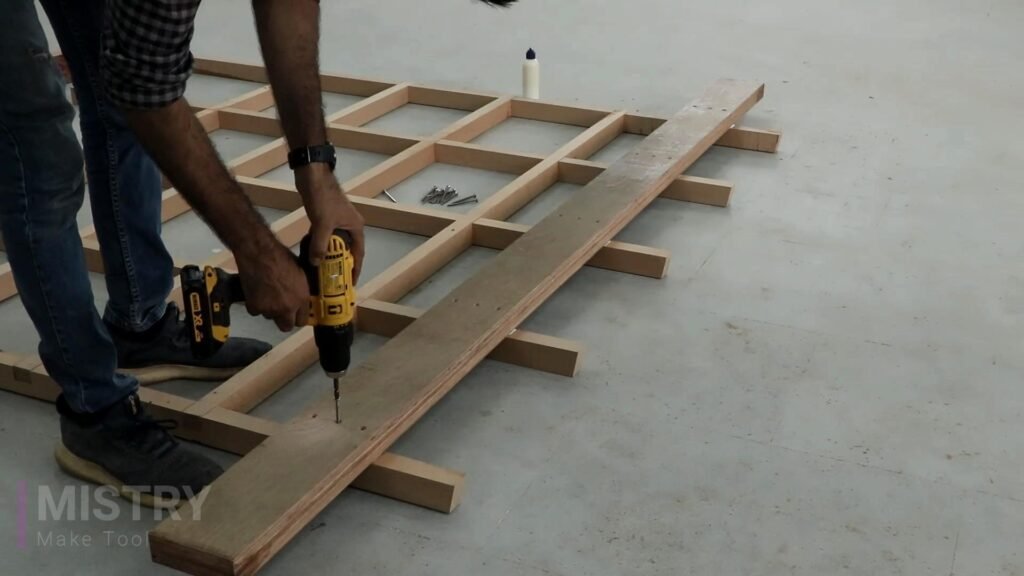
3. Circular Saw Carriage:
- Create a platform for the circular saw to be mounted on. This can be another wooden board.
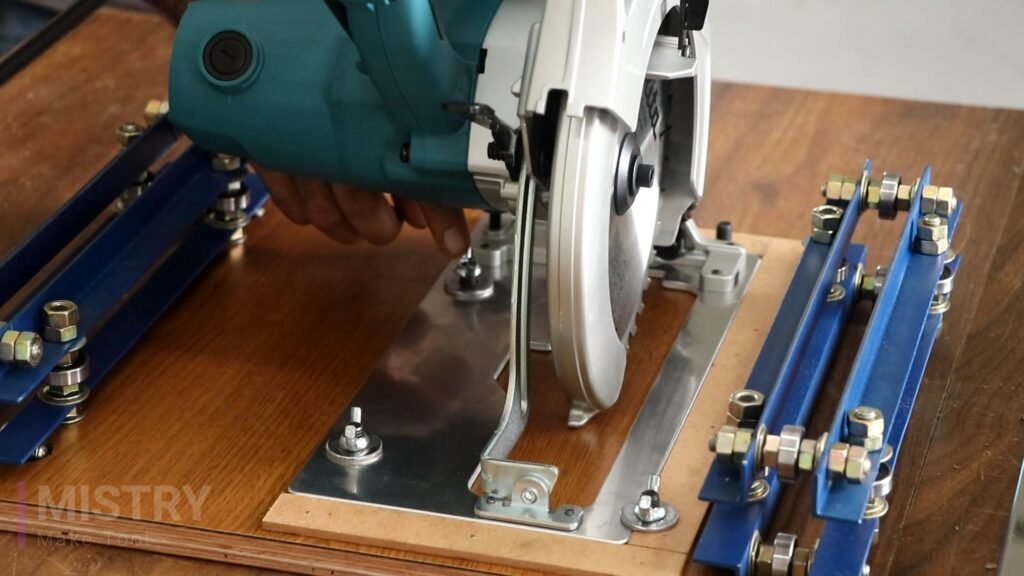
- First step make the bearing mechanism. Parts used to make this bearing mechanism are 8 Nos. Iron ¾” L-angles 12 Inch length, 16 Nos. Bearings 608 number, 8mm studs, nuts and washer.
- Attach this bearing mechanism with the base.
- I have used 12mm Plywood of a size 12 inch *12 inch with laminate for circular saw base.
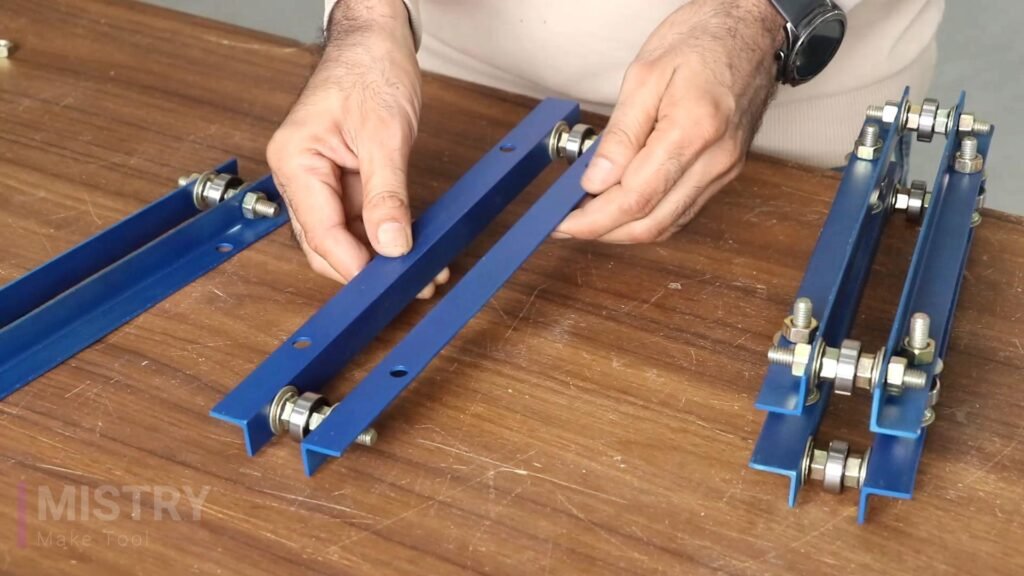
4. Steel Pipe Support:
- Cut the two steel pipes to the desired length based on your design. You’ll likely need two vertical pipes for support.
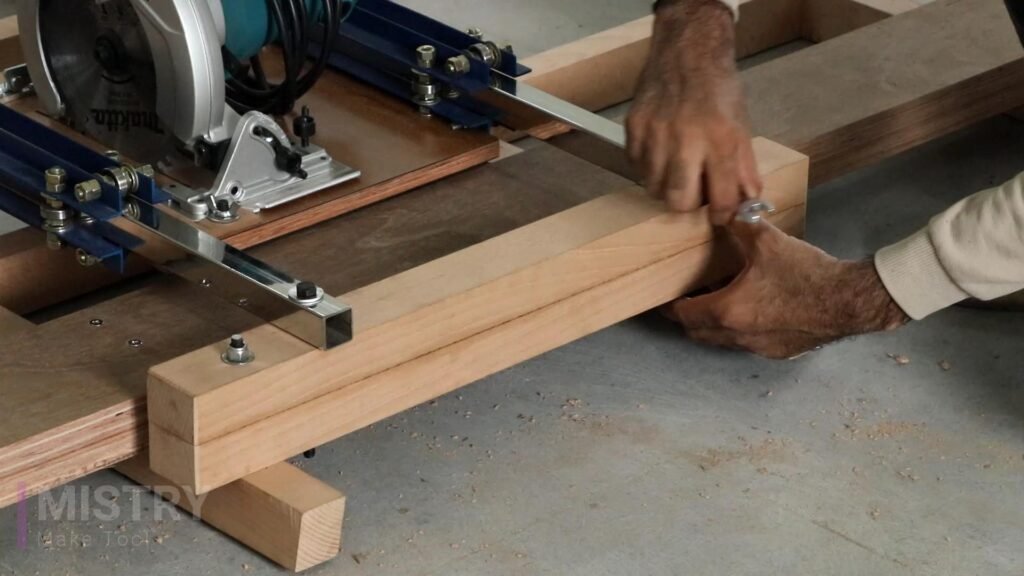
- Secure the steel pipes to the wooden frame using nuts and bolts.
Advertisement
5. Slide Mechanism:
- Attach the circular saw bearing guide platform with the steel pipes and frame structure, allowing it to slide vertically for height adjustment.
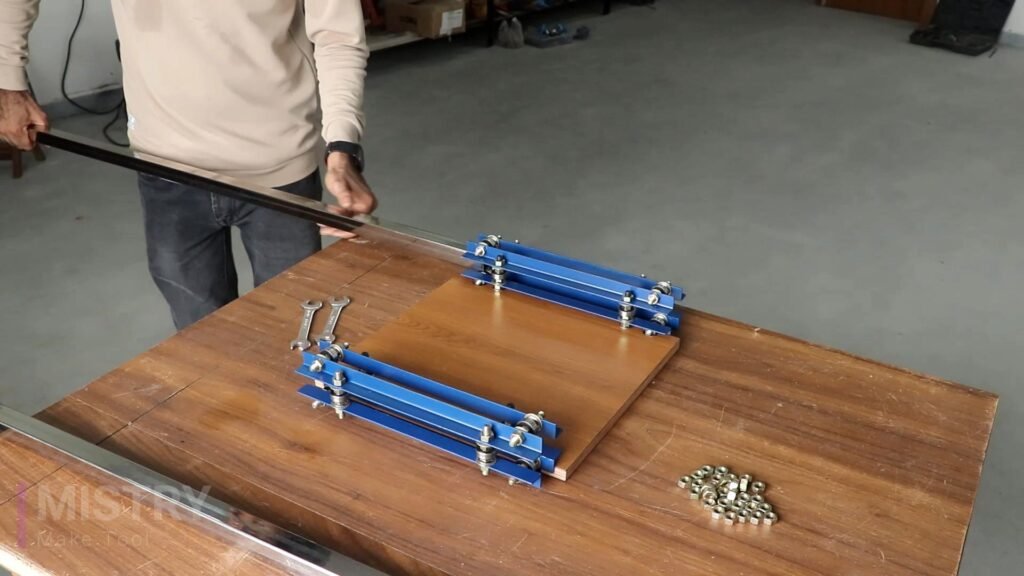
6. Circular Saw Mounting:
- Attach and secure the circular saw on the base plywood using 8mm countersunk bolts and fly nuts.
- Mount the circular saw upside down securely to the platform, ensuring the blade protrudes slightly below the platform’s bottom. Make sure it’s perfectly square for accurate cuts.
7. Height Adjustment with Pulley System:
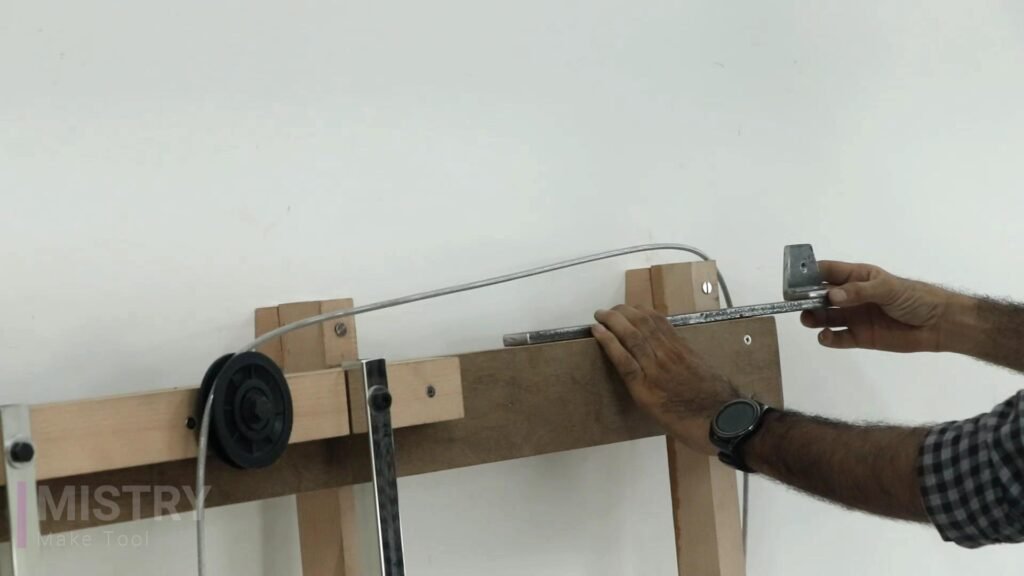
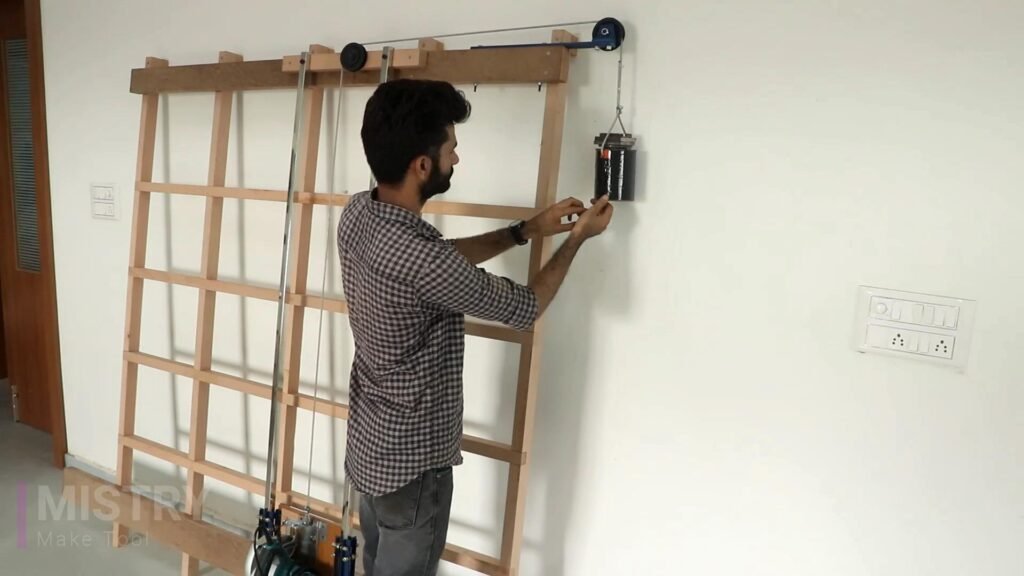
- If desired, install a pulley system at the top of the frame. One pulley will be attached to the platform holding the circular saw, and the other will be fixed. You can then use a rope or wire threaded through the pulleys to raise and lower the platform.
- Attach weight at the other end of the rope wire to balance the circular saw movement.
Advertisement
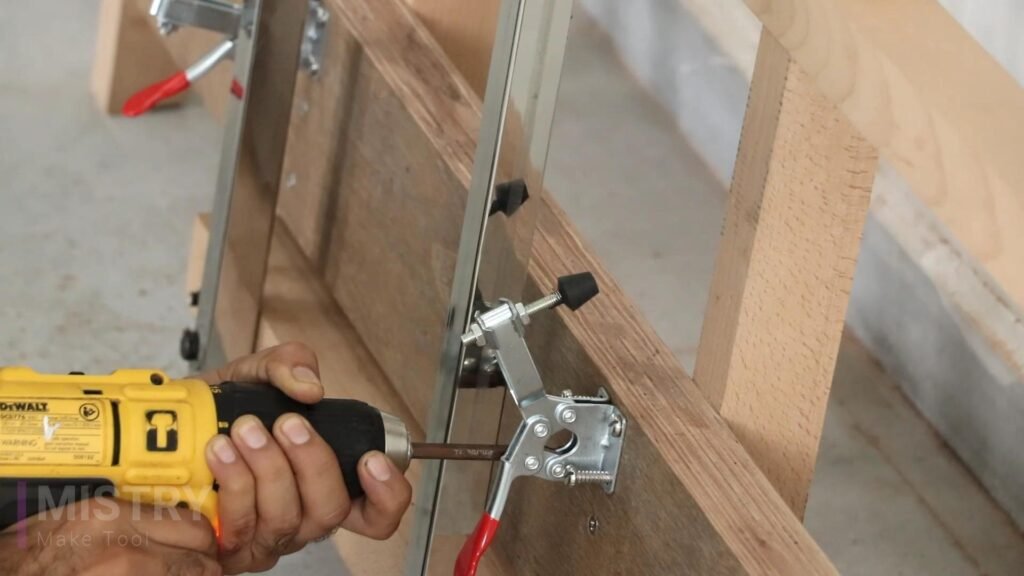
8. Attach The Toggle Clamp:
- I have used 4 Nos. toggle clamp in this panel saw. Toggle clamp is used to secure the plywood work piece for accurate cuts.
9. Testing and Adjustments:
- Test your panel saw with scrap wood to ensure smooth operation and accurate cuts. Fine-tune the fence position and blade alignment if needed.
Safety Tips:
- Always wear safety glasses, a dust mask, and gloves when operating the panel saw.
- Ensure the circular saw is securely mounted and the blade guard is in place.
- Double-check your measurements before making cuts.
- Use push sticks to guide material through the saw and avoid contacting the blade with your hands.
- Unplug the saw before making any adjustments or changing the blade.
By following these steps and prioritizing safety, you can create a functional and valuable DIY panel saw for your workshop.

