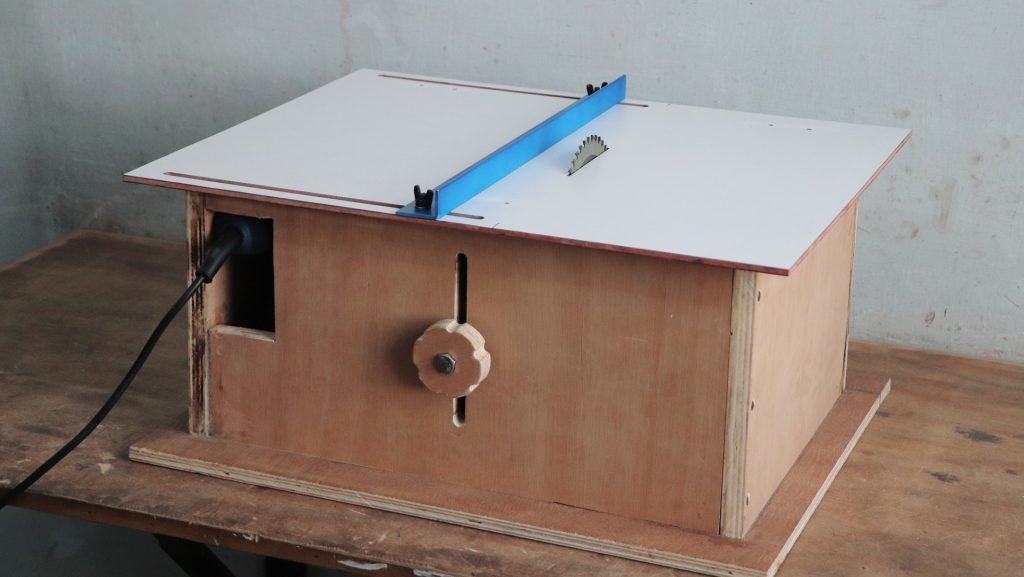
INTRODUCTION :
Drill powered table saw:-
A table saw is a woodworking tool, consisting of a circular saw blade, mounted on an arbor that is driven by an electric motor. The blade protrudes through the top of a table, which provides support for the material, usually wood, being cut.
Now In most modern table saws, the depth of the cut is varied by moving the cutter blade up and down: the higher the cutter blade protrudes above the table, the deeper the cut that is made in the material. In some early table saws, the cutter blade and arbor were fixed, and the table was moved up and down to expose more or less of the cutter blade. The angle of the cut is controlled by adjusting the angle of the cutter blade. Some earlier saws angled the table to control the cut angle of the table saw.
Benchtop table saws are lightweight and are designed to be placed on a table. This type of table saw is most often used by homeowners and DIYers. They almost always have a direct-drive or universal motor. Some early models used a small induction motor, which weren’t very powerful also made the saw heavy and caused a lot of vibration in the saw blade. Most modern saws are lightweight and can be lifted by one person and carried to and from a particular location. These saws often have parts made of steel, aluminum and plastic, and some other material and are designed to be compact and light.
I make a drill powered table saw machine. This table saw is accurate, compact, and lightweight and also easy to make. We can easily change the blade without any problem.
Parts Used :
Plywood piece for the base (21.5”*17”) 18 mm thickness
Laminated Maf sheet for the top (21.5”*17”) 6mm thickness
2 Plywood pieces for side wall (12.5”*9”) 18mm thickness
Plywood piece for side wall (19”*9”) 18mm thickness
Plywood piece for side wall (17.5”*9”) 18mm thickness
Plywood piece for drill base (11.75”*8”) 18mm thickness
Wooden block nut holder (1.5”*1.25”*3”) with sheet metal
L-section aluminum channel 17” length
Magne
2 nos. door hinges (0.75”*2”)
2 nos. door hinges (1”*3”)
3/8 bolt with nut (3.5” length)
Wooden kno
Drill machine with TCT blade
Drill adapter and washer for
cutter blade
Pipe clamp
2 nos. ¼ Allen key bolts with fly nuts and washers
Screws
How to make :
The first step is cutting all plywood pieces as per the dimensions shown in the parts used section. After cutting off all plywood pieces next step is to assemble these plywood pieces. Attach three plywood pieces on the base to make three sidewalls of the table, only the front side is taken left, shown in the image.


The next step is attaching the drill adapter and cutter blade in the drill chuck.
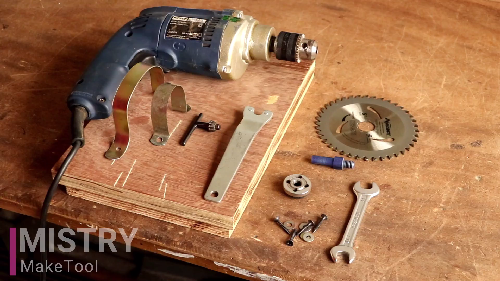
Next, attach the drill machine on the drill base plywood piece using of pipe clamp, as shown in the image.

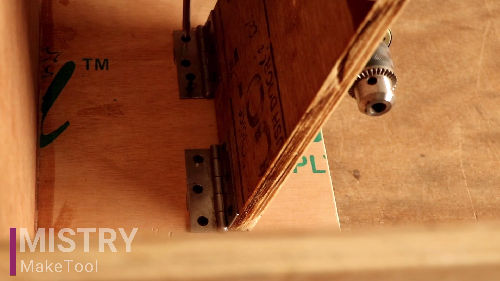
Also, I have attached the wooden block with a nut on the lower side of the drill base, shown in the image.


After that, I attach this drill base with a drill machine on the table by using of 2 nos. door hinges (1”*3”).
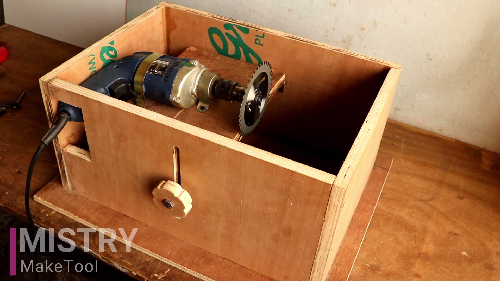
The next step is to make slots on the fourth front side wall plywood piece and attach it with the table. Slot in the middle of the front wall is for 3/8 bolt.

With the help of this 3/8 bolt and a wooden knob, the position of the drill base with drill machine is to change the movement from up and down, so we can change the depth of cut by of this table saw machine.
The last step is attaching the laminated MAF sheet (21.5”*17”) 6mm thickness with a table on top of the table by using of 2 nos door hinges (0.75”*2”). I have make the slots on two ends of the sheet for the movable fence. For proper positioning of the top sheet, I have attached the magnet.
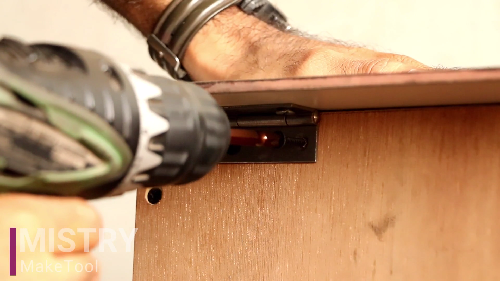

And at the last, I have attached the L-section aluminum channel 17” length, used as a movable fence.





very nicely explained in simple understandable langauage. I will be building a saw table as per your directons.
Thanks in advance
very nicely explained
Excellent article!
We are linking to this great
article on our website.
Keep up the great writing.