INTRODUCTION :
A grinding machine is used to drive abrasive wheels. Pedestal grinder is a similar version of a grinder that is mounted on a pedestal. These types of grinder machines are commonly used to hand grind various metal pieces, cutting tools and perform another rough grinding. It may be used for sharpening cutting tools such as tool bits, chisels, drill bits. Alternatively, it may be used to roughly shape metal before welding or fitting. In grinding machine a wire brush wheel and buffing wheels can be interchanged with the grinding wheels to clean and polish workpiece.
A disk sander machine is used to smooth materials such as woods and plastics. It is also used to remove small amounts of waste particles. The material is carefully and lightly pushed against the rotating disk and at the same time moved from left to right. Most disk sanders have an adjustable table. This allows the workpiece material to be sanded to an angle. Releasing a locking nut allows the table to be adjusted, the locking nut is then tightened keeping the table in the position. This can be very useful. However, the gap between the table and the disc increases as the angle of a disc is increased. This means that greater care must be taken when sanding a workpiece to produce an angle.
From this grinder with a disc sander machine you can make precise angles in wood and metal. With this machine, you can produce brilliant outer edge curves, and very accurate circles. You can accurately and quickly remove material and flatten off stock that’s too small to be safely planed. You can sharpen tools, tidy up rough edges, square up, and do extreme toenail manicure.
Parts Used :
- Plywood base (21.5” * 18.5”)
- Metal sheet (21.5” * 18.5”)
- Motor
- 0.5 HP Motor
- (3*1*A) V-belt pulley
- (A-23) V- belt
- ½” arbor
- Base for arbor (6” * 5”) 4” height
- 6” Grinding wheel
- Metal pieces for grinding wheel support
- Round plywood for disc (D-7.5” and D-6”)
- Sanding paper
- Plywood for a base table for disc sander (8.5” * 7” for base)
- 2 Nos. L- section channel (7” length)
- 4 Nos. 5/16” bolts (6” length) with washers and nuts
- 4 Nos. 3/8” bolts (1” length) with washers and nuts
- On-off switch
- Screws
- Wire
How to make :
Step 1:- Make a base
For accurate results it is necessary to have a very strong and solid base, smooth and vibration-free running, along with a perfectly flat and accurate work table with a parallel miter slot.

I have used plywood of 21.5” * 18.5” size with a metal sheet for a strong solid base. Sheet metal is increased the strength of the base.
Step 2:- Mounting the motor
This grinder with a disc sander machine is run by a 0.5HP single phase induction motor. It went well with very little vibration or noise. This motor is running at 1450rpm.
I did some modifications. I reverse the direction of the motor. In this machine the grinding wheel is running so it is necessary to reverse the direction of the motor, so we can work properly on the grinding wheel.

The motor is mounted on the base by using 4 Nos. 3/8” bolts of 1” length with nuts.
Step 3:- Mounting the arbour (grinder thada)
The arbor is mounted on the arbor support at the 4” height from the base. It is mounted on arbor support by using 4 Nos. 5/16” (6” length) bolts and nuts.

A major part of this grinding wheel with disc sander is an arbor. The grinding wheel and disc sander, both are run on the arbor, so it is necessary to mount arbor properly on the base.

Then, attach the grinding wheel on the arbor. I also make grinding support for work properly on the grinding wheel. The grinding support is made from metal, shown in the image.

Step 4:- Mounting the disc sander
The next step is mounting the disc sander on the other side of the arbor. The diameter of the disc is 7.5”.

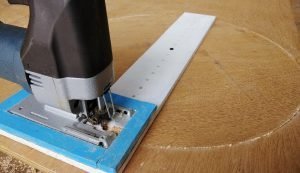
First of all, cut a circle from plywood of 7.5” and 6” diameter by using of jigsaw machine. It is easy to cut a perfect circle by using jigsaw circle cutting jig. Attach the sanding paper on it.

After that, I mounting disc sander on the arbor by using screws.

The last step is, make a worktable of the disc sander. A major part of the disc sander is a work table. Its basic function is to remain nice and solid at a set angle relative to the spinning disc. Worktable is made from plywood, also I attached a sheet metal on the worktable for better strength.

I also attach the wire and ON-OFF switch for easy on and off the machine.

Step 5:- Testing
Now, it’s time to test the machine. First I test the grinding wheel. The Grinding wheel is properly grinding and finish the workpieces that must show high surface quality and high accuracy of shape and dimension. It may be used for sharpening cutting tools such as tool bits, chisels, and drill bits. Alternatively, it may be used to roughly shape metal before welding or fitting.


Also test the disc sander. The disc sander is also properly worked.


