INTRODUCTION :
A drill press stand for a hand drill is useful when you have to carry out work with your power tool and it can help you do more and enhance the level of productivity. The hand drill machine is kept stable and secure and at a comfortable working height, and it helps to focus on your task rather than holding the device in your hand all the time. It helps to carry out various tasks easily, such as angled or perpendicular drilling with your hand drill.
The drill press stand provides a firm and stable foundation for you to drilling operations more accurately by hand drill machine. There are many types of drill press stands available in the market but I decided to make for my own. I have used an 18mm plywood sheet to make this stand and it’s very easy to make.
Material used :
Plywood sheet – 18mm
Drawer slides (2pcs) (8” length)
Drill machine – 13mm
Spring / flexible rope
Clamps (2 pcs)
Screws
How to make drill press stand :-
Step 1 : cut the plywood sheet

This drill press stand is made from a plywood sheet. The first step is to cut the plywood sheet. Cut the plywood sheet to make the base and sidewall of the stand. Make sure that the plywood sheet is cut in proper dimension and without any kind of error.
Step 2 : attachment of drawer slides and drill

For easy movement of the drill machine, I have used drawer slides. It provides a path for the drill machine for its up and down movement. I have used 8” long drawer slides, and it is attached by screws. Make sure that the drawer slides are attached in their proper position, its position is completely vertical at 90 degrees.

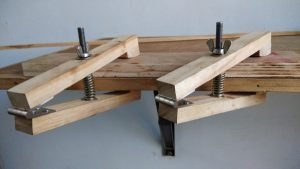
The next step is to attach the Drill machine with a stand by using clamps. Make sure that the drill machine is perfectly attached with a drill stand, and also the drill bit is completely vertical to the base, so the drill press is working properly without any kind of error.
Step 3 : Attach the cut-off ply sheet / make a stand
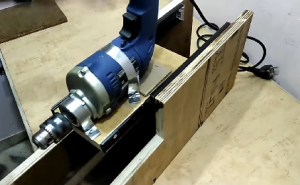
After cutting off all plywood sheet parts, the next step is to attach all these parts of the plywood sheet by using glue and screws. The glue is also used with screws to reduce the vibration in the stand. After that, it will be looks like the image shown.
Step 4 : spring / flexible rope
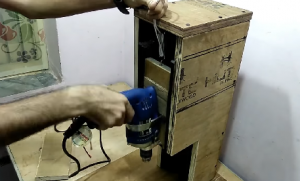
The last step is to attach the spring or flexible rope. Here I have used flexible rope instead of spring, but it’s your choice that what you want to use. In my opinion, spring is better than a flexible rope. Now the drill press is ready to use.
Advantages :
- It helps to enhance the level of productivity.
- Fast and accurate drilling operation.
- It helps to focus on your task rather than holding the device in your hand all the time.
- Design and construction are simple and easy to make.
- Easy to use.
- No complicated parts are required.


